Welcome to our iron farm tutorial, where you’ll discover the best design and techniques to create an efficient iron farm in Minecraft. If you’re tired of endlessly mining for iron, this step-by-step guide will show you how to automate the process and ensure a steady supply of this valuable resource.
How to Make an Iron Farm in Minecraft?
Iron is an essential material in Minecraft, used for crafting tools, weapons, and armor. By learning how to make an iron farm, you’ll save time and effort, allowing you to focus on exploring and enjoying the game. Let’s dive in and learn the secrets of building the best iron farm in Minecraft!
In this iron farm tutorial, we’ll cover everything you need to know, from understanding the mechanics behind iron golem spawning to gathering the necessary materials. We’ll guide you through constructing the villager and zombie areas, building the iron golem spawn area, and getting the necessary entities in place for a fully operational iron farm.
Whether you’re a seasoned Minecraft player or new to the game, our iron farm tutorial will provide valuable insights and tips to help you create an iron farm that suits your gameplay style. With our guidance, you’ll soon have a reliable source of iron that will level up your crafting abilities and enhance your overall Minecraft experience.
Understanding the Mechanics of an Iron Farm in Minecraft
Before you embark on constructing your iron farm in Minecraft, it’s crucial to grasp how this ingenious system functions. Iron golems are naturally spawned when at least three nervous villagers are in a designated area with beds. For the villagers to elicit a defensive stance and trigger iron golem spawning, they require a direct line of sight with a zombie. By capitalizing on this game mechanic, an iron farm can be created to automate iron golem spawning and disposal, efficiently gathering their drops for your use.
An iron farm in Minecraft harnesses the power of village dynamics and zombie-villager interactions to create a sustainable source of iron. Through a carefully designed structure and appropriate positioning of villagers and zombies, players can establish a functioning iron farm that consistently generates iron golems, eliminating the need for extensive mining.
To delve further into the specifics of constructing an effective iron farm, continue reading the step-by-step iron farm guide outlined in this article. Discover the key components, design considerations, and optimization techniques that will empower you to build an iron farm that meets your iron production needs.
To enhance your understanding of how iron farms work, let’s examine the essential mechanics that enable these ingenious structures to function:
Village Dynamics
In Minecraft, villages are formed when villagers detect houses with beds and meeting certain criteria. Each village has a “village center” determined by the location of valid beds. Villagers within a village interact and abide by specific rules, including mating, trading, and gathering around a village center.
Zombie-Villager Interactions
When zombies attack villagers, there are two possible outcomes: the conversion of the villager into a zombie or the villager triggering its “defensive” state against the zombie. When a villager becomes defensive, it has the potential to summon an iron golem to defend it. This defensive state is achieved by establishing a direct line of sight between the villager and the zombie.
Iron Golem Spawning and Killing
Iron golems spawn naturally in villages and iron farms. In a successfully constructed iron farm, when villagers enter the defensive state due to a zombie’s presence, they have the potential to summon an iron golem to protect them. The iron golem spawns within a specific range of the village center, usually on a spawning platform. The design of the iron farm ensures convenient access to the spawning platform for subsequent automated killing and looting of the iron golem drops, typically iron ingots.
Gathering the Required Materials for Your Iron Farm
Building an efficient iron farm in Minecraft requires specific materials to ensure its success. Here are the essential items you’ll need:
Solid, Non-Flammable Blocks
The foundation of your iron farm should be made of solid blocks that are non-flammable. Common choices include cobblestone, stone bricks, or nether bricks. These sturdy blocks will provide the necessary support and stability for your farm’s structure.
Walls
Constructing walls around your iron farm is crucial for keeping the villagers and other elements contained within the designated areas. Use blocks such as fences or glass panes to create the walls, ensuring a safe and enclosed space.
Sticky Pistons
Sticky pistons are essential for controlling the movement of blocks and components in your iron farm. They enable mechanisms like opening and closing walls, allowing the necessary interactions between the villagers, zombies, and spawning platforms.
Sculk Sensors
Sculk sensors are a valuable addition to your iron farm. These unique blocks detect vibrations and emit a redstone signal, offering a high level of control and automation. You can incorporate sculk sensors into various parts of your farm to optimize its functionality.
Buckets of Water and Lava
Water and lava play important roles in your iron farm’s design. Water can be used to guide iron golems towards the killing area, while a lava source can quickly eliminate them. Collect buckets of water and lava to implement these crucial elements effectively.
Signs
Signs are useful for providing instructions and information within your iron farm. They can help guide the villagers, mark specific areas, or display warnings and reminders for maintenance and operation.
Hoppers, Chest, and Name Tag
Hoppers, along with a chest, are essential for collecting the valuable iron ingots dropped by the iron golems. Place hoppers beneath the killing area to ensure the items are automatically collected. Additionally, you will need a name tag to name your zombie for proper triggering of the iron golem spawning mechanism.
These materials can be obtained through various means, including crafting or finding them in villages and other structures. Once you have gathered the necessary materials, you’ll be ready to start building your iron farm in Minecraft.
| Materials | Usage |
|---|---|
| Solid, Non-Flammable Blocks | Build the foundation and structure of the iron farm |
| Walls | Create boundaries to contain villagers and other farm components |
| Sticky Pistons | Control the movement of blocks and mechanisms |
| Sculk Sensors | Provide automation and redstone signal detection |
| Buckets of Water and Lava | Guide iron golems and eliminate them |
| Signs | Display instructions and information within the farm |
| Hoppers, Chest, and Name Tag | Collect iron ingots and trigger iron golem spawning |

Constructing the Villager Area
Now that you have a clear understanding of the mechanics behind an iron farm in Minecraft, it’s time to start building your own. The first step is to construct the area dedicated to the villagers. This is where they will sleep, and their proximity to a zombie will trigger the spawning of iron golems. To ensure a successful iron farm setup, follow these key steps:
Building a Platform for Villagers
- Create a spacious platform using solid, non-flammable blocks such as stone or wood. This will serve as the sleeping area for the villagers.
- Ensure there are at least three beds placed on the platform. The beds should be within range of the zombie, allowing the frightened villagers to trigger the iron golem spawning.
- To ensure the villagers can see the zombie, provide a clear line of sight between them by keeping the platform open and free from obstructions.
- Consider elevating the platform or using fences to separate the villagers from other structures or mobs that could obstruct their view.
Transporting the Villagers
- Transport the villagers to their designated location using a stairway or minecarts. This will ensure they reach the platform safely and without getting lost along the way.
- If using minecarts, create a track system that connects their starting location to the platform. Make sure the minecarts are easily accessible to the villagers.
By following these steps, you will have successfully constructed the villager area of your iron farm. This is a crucial component that sets the foundation for the efficient production of iron golems. In the next section, we will explore how to set up the zombie area to complete your iron farm design.
Setting Up the Zombie Area
Once you have created the designated area for the villagers, the next step in building your automatic iron farm system is setting up the zombie area. This crucial component will scare the villagers and trigger the spawning of iron golems. By strategically controlling the visibility of the zombie to the villagers using sticky pistons and sculk sensors, you can ensure a continuous cycle of iron golem spawning.
To set up the zombie area, follow these tips for building iron farms in Minecraft:
Tip 1: Sticky Pistons
Use sticky pistons to control the movement of blocks and create a mechanism that reveals or hides the zombie from the villagers. By extending or retracting the sticky pistons, you can control the visibility of the zombie, ensuring the villagers remain scared and continue to spawn iron golems.
Tip 2: Sculk Sensors
Incorporate sculk sensors, a new redstone component introduced in Minecraft 1.17, into your iron farm system. These sensors can detect vibrations and provide a signal, allowing you to activate the sticky pistons at the right time. By connecting the sculk sensors to the sticky pistons, you can automate the process and create a seamless cycle of iron golem spawning.
Here is an example of how the zombie area can be set up using sticky pistons and sculk sensors:
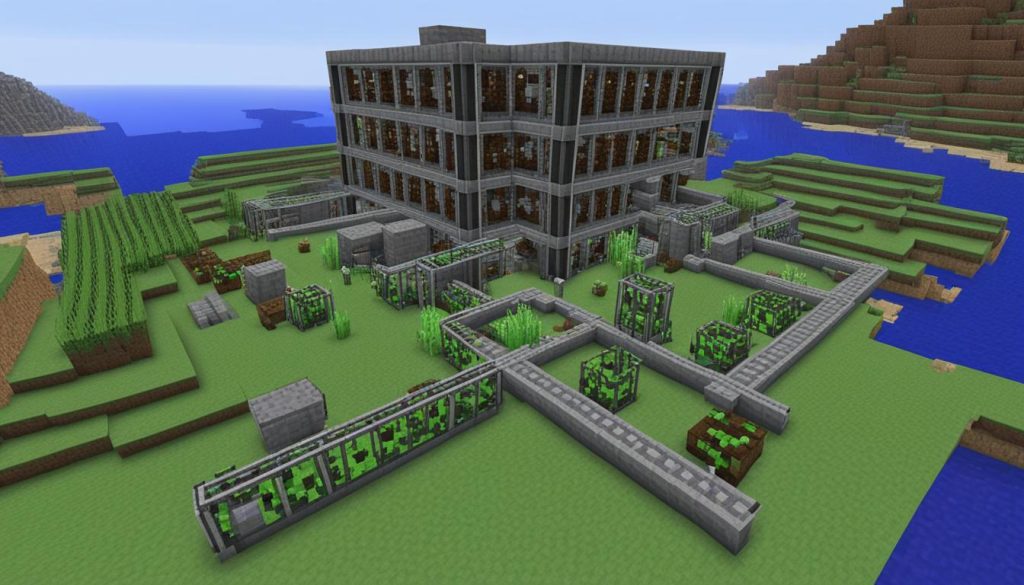
| Zombie Area Setup | Description |
|---|---|
| 1 | Place sticky pistons in a way that allows them to reveal or hide the zombie from the villagers. |
| 2 | Position sculk sensors near the zombie area to detect vibrations and trigger the activation of the sticky pistons. |
| 3 | Ensure that the sculk sensors are connected to the sticky pistons using redstone circuitry to automate the process. |
By employing these techniques and using sticky pistons and sculk sensors effectively, you can create an efficient and automated iron farm system in Minecraft. This ensures a continuous supply of iron golems for you to defeat and collect their valuable drops. With this setup, you’ll never have to worry about manually triggering iron golem spawning again.
Building the Iron Golem Spawn Area
Now that you have set up the villager and zombie areas, it’s time to construct the iron golem spawn area for your Minecraft iron farm. This particular design allows for automatic spawning and killing of iron golems without the need for villagers. Follow these steps to create an efficient and sustainable iron farm:
- Create a sturdy roof over the structure where the villagers are located. This roof will ensure that the iron golems spawn within the designated area and prevent them from wandering away. Use solid, non-flammable blocks like stone or iron to construct a secure enclosure.
- Position water blocks strategically to push the iron golems towards a killing area. This will allow you to collect their drops, particularly the valuable iron ingots. Arrange the water in a way that funnels the iron golems towards a specific spot.
- Set up a hopper and chest next to the killing area to collect the iron ingots conveniently. The hopper will transfer the drops from the kill area into the chest, ensuring that you have a steady supply of iron ingots.
By following these steps, you can create an iron farm in Minecraft survival mode without relying on villagers. This method provides a sustainable source of iron ingots and eliminates the need for continuous mining, making your survival journey easier and more enjoyable.
Getting the Zombie and Villagers on the Farm
To successfully set up your iron farm in Minecraft on Nintendo Switch or Minecraft PE, you need to ensure that the zombie and villagers are in their designated areas. This can be accomplished using a variety of methods that suit your gameplay style and available resources. Here are three effective approaches:
- Using Minecarts: Transporting the zombie and villagers via minecarts is a convenient option. Simply build a track system that connects the starting point to the farm. Place minecarts and ensure the entities get inside them. Then, push the minecarts to the desired locations.
- Luring with Job Site Blocks: Job site blocks, like workstations or composters, can attract villagers. Place these blocks near the farm, and the villagers will naturally migrate towards them due to their default behavior. Similarly, you can use food to lure them to the desired location; for example, holding carrots can encourage them to follow you.
- Manual Guidance: If you prefer a hands-on approach, you can manually push the zombie and villagers towards their respective spots on the farm. This method may require more effort and time, but it can be effective if you have limited resources.
Choose the method that best suits your circumstances and allows for efficient placement of the zombie and villagers on the iron farm. Remember, a well-organized farm will optimize iron golem spawning, ultimately leading to a bountiful supply of iron for all your Minecraft adventures.
Tips for Moving Entities:
Moving entities in Minecraft can sometimes be challenging. Here are a few tips to make the process smoother:
- Clear Pathways: Ensure there are no obstructions between the starting point and the farm, whether you’re using minecarts or manually pushing entities. Clear any blocks or obstacles along the way to avoid unnecessary delays.
- Utilize Leads: If you have access to leads, you can tether the villagers and the zombie to yourself. This way, you can guide them precisely to their designated locations without the risk of losing them along the way.
- Plan Ahead: Before initiating the process of moving the zombie and villagers, familiarize yourself with the layout of the farm. This will help you strategize the most efficient paths and minimize any potential issues or complications.
Pros and Cons of Different Methods
| Method | Pros | Cons |
|---|---|---|
| Using Minecarts | Efficient and fast transport | Requires crafting minecarts and tracks |
| Luring with Job Site Blocks | Natural behavior of the villagers | Dependent on job site blocks or food availability |
| Manual Guidance | Accessible and cost-effective | Time-consuming and potentially labor-intensive |
Conclusion
Congratulations! You have now mastered the art of creating an iron farm in Minecraft. By following our step-by-step tutorial and implementing the helpful tips and tricks provided, you are well-equipped to build an efficient and productive iron farm to fulfill all your iron-related needs within the game.
With a reliable source of iron, your crafting possibilities will expand significantly, allowing you to create powerful tools, armor, and intricate redstone contraptions. Say goodbye to endless mining trips and hello to a more enjoyable and seamless gameplay experience.
Remember to experiment with different designs and techniques to find the one that suits your playstyle best. Building an iron farm also provides an opportunity to unleash your creativity and add a visually appealing structure to your Minecraft world.
Now that you possess this valuable knowledge, it’s time to grab your materials and start constructing your very own iron farm. Happy farming!


