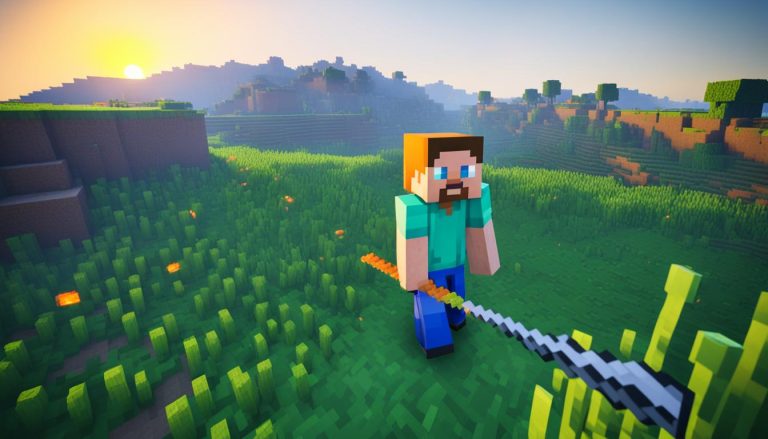
Are you looking to enhance your Minecraft gaming experience? Adding shaders to Minecraft can give your gameplay a visual upgrade, bringing stunning graphics and immersive visuals to your world. In this step-by-step Minecraft shader setup guide, we will walk you through the process of installing shaders and customizing them to suit your preferences.
How to Add Shaders to Minecraft?
Are you ready to take your Minecraft game to the next level? Installing shaders can enhance your gaming experience and bring stunning visual effects to your Minecraft world. Follow these step-by-step instructions to install Minecraft shaders and transform your gameplay.
Step 1: Install OptiFine
To begin, you’ll need to install the OptiFine mod. OptiFine acts as a foundation for installing shaders and improves the overall performance of Minecraft. Here’s how to do it:
- Visit the official OptiFine website (https://optifine.net) and download the latest version of OptiFine for your Minecraft version.
- Run the OptiFine installer by double-clicking on the downloaded file.
- Follow the prompts to add OptiFine as a new version of Minecraft in your Minecraft Launcher.
Step 2: Launch OptiFine and Prepare for Shaders
Once OptiFine is installed, launch the OptiFine version of Minecraft. Here’s what to do next:
- Open the Minecraft Launcher and select the OptiFine version from the list of available versions.
- Click “Play” to start Minecraft with OptiFine.
- Navigate to the Options menu, then Video Settings and finally Shaders.
- Click on the “Shaders Folder” button to open the folder where shader packs are installed.
Step 3: Download and Install Shader Packs
Now it’s time to download and install the shader pack of your choice. Here’s how:
- Find a reliable source for downloading shader packs. Some popular options include:
- Shaders Mods: https://www.shadersmods.com/
- CurseForge: https://www.curseforge.com/minecraft/customization/shaders
- Planet Minecraft: https://www.planetminecraft.com/resources/shaders/
- Download the shader pack file (*.zip) from your chosen source.
- Locate the Shaderpacks folder in your Minecraft installation directory. This can usually be found in the following path (replace “Username” with your computer’s username):
| Operating System | Directory Path |
|---|---|
| Windows | %appdata%\.minecraft\ |
| macOS | ~/Library/Application Support/minecraft/ |
| Linux | ~/.minecraft/ |
- Drag the downloaded shader pack file into the Shaderpacks folder.

That’s it! You’ve successfully installed Minecraft shaders. Now, when you launch Minecraft, you can select your installed shader pack from the Shaders menu. Enjoy the enhanced graphics and visual effects as you explore your Minecraft world.
The Best Minecraft Shaders
Enhance your Minecraft world with the best shader packs available. These shaders offer a range of unique effects and visual enhancements, allowing you to add realistic graphics and immerse yourself in a stunning Minecraft experience. Here are some of the top shader packs recommended for enhancing your gameplay:
- Sonic Ether’s Unbelievable Shaders: This shader pack offers breathtaking lighting and shadow effects that transform the Minecraft world into a stunning masterpiece.
- Continuum Shaders: Known for its realistic rendering and attention to detail, Continuum Shaders provides an immersive visual experience with its advanced graphical effects.
- BSL Shaders: BSL Shaders enhances Minecraft with beautiful atmospheric effects, including vibrant lighting and stunning water reflections.
- Sildur’s Vibrant Shaders: Sildur’s Vibrant Shaders adds depth to your Minecraft world with its vibrant colors, improved shadows, and realistic water rendering.
- KUDA Shaders: KUDA Shaders offers a range of options for customizing your visuals, including impressive light and shadow effects that enhance realism.
- ProjectLUMA: ProjectLUMA focuses on enhancing the lighting and colors of Minecraft to create a more immersive and visually appealing environment.
- Nostalgia Shader: Nostalgia Shader adds a nostalgic feel to your Minecraft world, emulating the graphical style of older game consoles.
- Chocapic13’s Shader: Chocapic13’s Shader provides stunning visuals with its realistic lighting, shadows, and reflections.
- Naelego’s Cel Shaders: Naelego’s Cel Shaders offers a unique cel-shaded art style, giving your Minecraft world a cartoon-like appearance.
Each of these shader packs brings something different to the table and can greatly enhance the visuals of your Minecraft world. Choose the one that suits your preferences and enjoy an immersive gaming experience like never before.
Customizing Shaders in Minecraft
Once you have installed shaders in Minecraft, you may want to customize them to suit your preferences. Many shader packs offer customizable options that allow you to adjust settings such as brightness, saturation, and shadow intensity.
These settings can be accessed in the Shaders menu within the Options menu in Minecraft. Experiment with different options to find the perfect balance of visual effects for your gameplay experience.
Customizable Settings in Shaders
When customizing shaders in Minecraft, you’ll typically encounter a range of settings that can be adjusted to fine-tune the visual effects. Some of the common settings you may find include:
- Brightness: Adjust the overall brightness level of the shaders.
- Saturation: Control the richness and depth of colors in your Minecraft world.
- Shadow Intensity: Define the darkness and depth of shadows cast by objects.
- Weather Effects: Enable or disable certain weather effects like rain or snow.
- Depth of Field: Adjust the focus and blur effect in distant and close objects.
By experimenting with these settings, you can personalize your Minecraft shaders to create the perfect visual atmosphere for your gameplay.
Example Customization: Brightness and Shadow Intensity
Let’s take a closer look at how you can customize shaders in Minecraft by adjusting the brightness and shadow intensity settings.
| Setting | Description |
|---|---|
| Brightness | Adjusts the overall brightness level of the shaders. |
| Shadow Intensity | Defines the darkness and depth of shadows cast by objects. |
By increasing the brightness, you can create a more vibrant and illuminated Minecraft world. Conversely, reducing the brightness can give your game a darker and more atmospheric look.
Adjusting the shadow intensity allows you to control the depth and realism of shadows. Increasing the shadow intensity can create more pronounced and dramatic shadows, while decreasing it can produce softer shadows and a more subtle effect.
By finding the right balance between brightness and shadow intensity, you can create a personalized visual experience that enhances your gameplay and immerses you in the world of Minecraft.
Troubleshooting Minecraft Shader Errors
While installing and using shaders in Minecraft is generally straightforward, you may encounter some errors or issues along the way. Common shader errors include black screens, graphical glitches, and game crashes. If you experience any of these issues, try the following troubleshooting steps:
- Update your graphics drivers: Outdated or incompatible graphics drivers can cause shader errors. Visit the website of your graphics card manufacturer and download the latest drivers for your specific model. Make sure to follow the installation instructions provided.
- Ensure you have the latest version of OptiFine: OptiFine acts as the foundation for installing shaders in Minecraft. Visit the official OptiFine website and download the latest version compatible with your Minecraft version.
- Check shader pack compatibility: Verify that the shader pack you downloaded is compatible with your Minecraft version. Some shader packs may only work with specific Minecraft versions, so double-check the compatibility before installation.
If the above steps don’t resolve the issue, you can seek help from the Minecraft community. There are online forums, communities, and social media groups dedicated to Minecraft shaders, where you can ask questions and find assistance from experienced users. Here are some popular Minecraft shader communities:
Remember to provide detailed information about the issue you’re facing when seeking help. This can include your Minecraft version, shader pack name, and any error messages you encounter. The more information you provide, the better the community can assist you in troubleshooting and resolving the shader errors.

| Error | Possible Causes | Solutions |
|---|---|---|
| Black screens |
|
|
| Graphical glitches |
|
|
| Game crashes |
|
|
Conclusion
Adding shaders to Minecraft can greatly enhance the visual experience of the game, creating a more realistic and immersive environment. By following the step-by-step guide for installing shaders and exploring different shader packs, you have the ability to customize and enhance your Minecraft world to your exact preferences. However, it’s important to note that using shaders may require a more powerful computer and can impact game performance. It’s also crucial to choose reputable sources for downloading shader packs to ensure a safe and reliable experience.
With shaders, you can take your Minecraft gameplay to the next level and enjoy stunning graphics and visuals. Immerse yourself in detailed lighting, realistic shadows, and captivating effects that make your Minecraft world come alive. Whether you’re looking for a more vibrant and colorful experience or a more atmospheric and moody atmosphere, shader packs offer a wide range of options to suit your aesthetic preferences.
Remember to keep your computer specifications in mind and choose shader packs that are compatible with your Minecraft version. Experiment with different settings and options to find the perfect balance between stunning visuals and smooth gameplay in Minecraft. Enhance your Minecraft world with shaders and embark on a visually captivating adventure like never before.
FAQ
How to Use Shaders in Minecraft Without Optifine?
While Optifine is a popular and reliable way to use shaders in Minecraft, there are other methods as well. One option is to use a shader mod such as Forge or Fabric, which allows you to install different shaders without using Optifine. Another alternative is to download and use an alternative shader pack that does not require Optifine. However, be sure to research the compatibility of these options with your specific version of Minecraft before downloading.
Where to Put Shaders in Minecraft Folder?
In order to add shaders to your Minecraft game, you will need to first locate your Minecraft folder. This can usually be found under the “AppData” or “Roaming” folders in your computer’s files. Once you have located the Minecraft folder, open it and look for a subfolder called “shaderpacks.” This is where you will place your downloaded shader packs. Simply drag and drop the shader pack files into this folder, and they will be ready for use in your game!
Do you need OptiFine for shaders?
While it is not necessary to have OptiFine for shaders in Minecraft, it is highly recommended. OptiFine enhances the performance and graphics of the game, making it easier and smoother to run shader packs. However, if you have a high-performance computer, you may be able to run shaders without OptiFine. It ultimately depends on your personal preference and computer specs.

