Welcome, fellow Minecrafters, to the ultimate guide on how to find iron in Minecraft! Iron is a crucial resource for crafting various tools, armor, and other essential items in the game. In this article, we will explore the best ways to get iron and uncover hidden techniques that will ensure your success in acquiring this valuable ore.
Are you ready to embark on an epic mining adventure? Let’s dive in and discover the secrets of locating iron in the vast world of Minecraft.
One of the most effective methods for finding iron ore is through underground mining. By venturing into caves and ravines, you will come across abundant iron veins waiting to be discovered. Don’t forget to bring torches to light up the path and mine strategically to optimize your iron-gathering efforts.
How to Find Iron in Minecraft?
Underground Mining
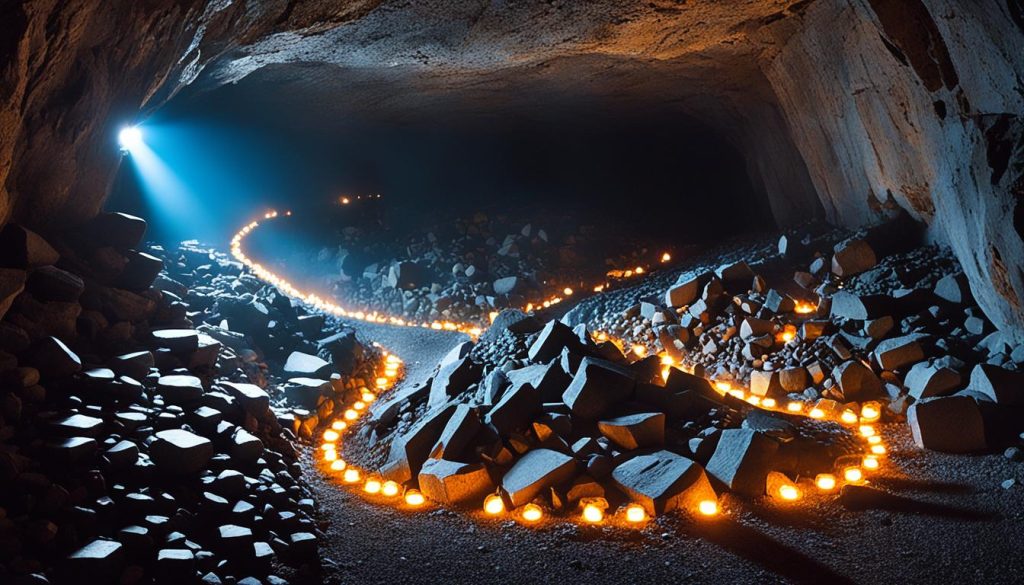
Underground mining is one of the most reliable methods for finding iron in Minecraft. By venturing into caves and ravines, players can uncover plentiful iron ore veins. To ensure a successful mining expedition, here are some essential tips:
- Bring torches: The dark corners of caves and ravines can be treacherous. Illuminating the area with torches not only keeps mobs at bay but also helps reveal hidden iron ore.
- Mine strategically: Instead of aimlessly digging, focus on areas that show signs of large ore deposits. Look for clusters or veins of stone, as they often indicate the presence of iron ore.
Mining underground offers a sense of adventure as players traverse the depths of Minecraft’s vast underground world. With the right preparation and a keen eye, abundant supplies of iron ore can be easily found and collected.
Stay tuned for the next section, where we will explore another exciting location for finding iron in Minecraft.
Abandoned Mineshafts
Exploring abandoned mineshafts can be an exciting and rewarding strategy for finding iron in Minecraft. These hidden treasures often hold valuable resources, including the precious iron ore you seek. However, it’s important for players to exercise caution as they navigate these eerie subterranean tunnels, as they are often inhabited by cave spiders—a challenging foe for any adventurer.
By approaching abandoned mineshafts with careful exploration and strategic planning, players can successfully collect iron from these spooky places. Keeping torches on hand to light up the dark corners will not only provide visibility but also discourage hostile mobs from lurking in the shadows.
Uncover the secrets of the abandoned mineshafts and discover the iron waiting to be claimed.
Underwater Exploration
When it comes to efficient iron farming in Minecraft, underwater exploration can be an excellent strategy. By diving deep into the ocean, players can discover shipwrecks scattered across the ocean floor, each potentially containing valuable iron ingots waiting to be looted.
Exploring these sunken vessels requires careful planning and preparation. It’s essential to bring enough air supply to comfortably explore these underwater ruins. By using potions of water breathing or enchanting helmets with the respiration enchantment, players can extend their time underwater, giving them more opportunities to gather iron.
Below is a list of tips for successful underwater exploration and efficient iron gathering:
- Equip yourself with a diving helmet enchanted with respiration or carry potions of water breathing to prolong your time underwater.
- Bring an underwater torch or night vision potions to illuminate the shipwrecks and improve visibility.
- Carry an iron pickaxe or silk touch pickaxe to collect iron blocks and ore without losing any resources.
- Be mindful of hostile underwater mobs such as guardians and drowned. Equip yourself with armor, weapons, and potions for protection.
- Utilize a combination of swimming and walking techniques to navigate through the shipwrecks smoothly.
By following these strategies and exploring the depths of the Minecraft ocean, you’ll be able to efficiently farm iron and bolster your resources for your future adventures.

Mountains and Extreme Hills
For players who enjoy heights and challenges, mountains and extreme hills biomes are excellent locations to find iron in Minecraft. These landscapes often have exposed iron ore, which players can mine for. Whether flying with elytra or building staircases, conquering these peaks will reward players with plentiful iron resources.
If you’re looking to gather iron quickly in Minecraft, the mountains and extreme hills biomes offer a great opportunity. Here’s what you need to know:
Tools to Find Iron in Minecraft
- Iron pickaxe: To mine iron ore, you’ll need an iron pickaxe. Craft one using iron ingots, which can be smelted from iron ore in a furnace.
- Torches: These are essential for lighting up caves and dark areas in the mountains and extreme hills biomes. Carry a good supply to ensure you can see where you’re going and spot any hidden iron veins.
- Elytra (optional): If you have the elytra, you can glide through the air, easily navigating the tall peaks and reaching distant iron deposits.
- Building blocks: Staircases and bridges made from materials like cobblestone or wood can help you reach higher elevations and explore the mountains or extreme hills with ease.
Now that you have the right tools, it’s time to start your iron mining adventure in the mountains and extreme hills. Look for exposed iron ore veins on the surface or inside caves. Remember to replenish your torches and stay alert for any hidden treasures or dangerous mobs that may be lurking.
Branch Mining
When it comes to efficient iron farming in Minecraft, branch mining is one of the top techniques to consider. By utilizing this mining strategy, players can maximize their iron ore yield and quickly stock up on this valuable resource.
To begin branch mining, start by digging a straight tunnel at a low level, such as around level 11 or 12. This level is ideal as it allows for a good balance between encountering valuable resources and avoiding excessive lava pockets. Once the main tunnel is established, players can start branching off every few blocks to explore additional areas.
It is crucial to use torches liberally during branch mining to ensure that all areas are well-lit. This not only helps in spotting iron ore veins but also prevents hostile mobs from spawning and causing unwanted disruptions in the mining process.
Branch mining is a method that requires patience and a keen eye for spotting valuable resources. By systematically exploring various branches, players can come across a plethora of iron ore within a relatively short time.
Here is an example of how a branch mining setup might look:
| Branch | Tunnel Start Coordinates | Branch Start Coordinates |
|---|---|---|
| Branch 1 | 11, 64, -22 | 11, 64, -20 |
| Branch 2 | 11, 64, -22 | 11, 64, -24 |
| Branch 3 | 11, 64, -22 | 11, 64, -26 |
This table represents a branch mining setup with three branches starting from a tunnel with coordinates 11, 64, -22. Players can repeat this pattern, creating multiple branches to cover a larger area and increase their chances of discovering iron ore deposits.
Through efficient branch mining, Minecrafters can significantly speed up their iron gathering process, allowing for more time to focus on other in-game activities. So grab your pickaxe, light up those tunnels, and start your journey towards a rich and prosperous iron supply!
Villager Trading
Establishing a village in Minecraft can be beneficial for obtaining iron. Blacksmith villagers often have iron gear and ingots for sale. By trading emeralds for these valuable resources, players can bolster their iron stash and improve their mining capabilities.
Tips for Successful Villager Trading
- Locate a village: Search for villages in the Minecraft world by exploring different biomes.
- Find a blacksmith: Look for buildings with forges and chests that contain valuable items, including iron gear.
- Interact with the blacksmith villager: Right-click on the villager to open the trading interface.
- Trade emeralds for iron: Blacksmith villagers often have iron gear and ingots available for trade. Offer emeralds in exchange for these resources.
- Trade with other villagers: Some villagers offer items that can be used to obtain iron or can be traded for emeralds, such as coal or emerald ore.
Villager trading provides a convenient way to acquire iron in Minecraft without having to rely solely on mining. By establishing positive relationships with villagers and utilizing the resources they offer, players can enhance their iron gathering strategies and progress further in the game.
Conclusion
Looking for iron ore in Minecraft? Look no further! With a range of strategies and locations at your disposal, efficient iron farming has never been easier. Whether you prefer underground mining, exploring abandoned mineshafts, embarking on underwater adventures, scaling mountains and extreme hills, branch mining, trading with villagers, or exploring caves and ravines, there’s a method for everyone. Diversify your gameplay and tap into your creative side to acquire the abundant iron resources you need.
Remember, Minecraft is a game of exploration and imagination. Don’t be afraid to experiment with different strategies and locations as you embark on your iron hunting journey. Discover the Minecraft iron ore location that suits your playstyle best and get ready for some rewarding mining sessions. So grab your pickaxe, don your armour, and get out there – happy mining!

